Tek scope screen capture with Bash
2023-07-22
I have a Tektronix TDS2014 oscilloscope (4-channel, 100 MHz, 1 GS/s) from the early 2000s. It’s useful for troubleshooting devices and while prototyping circuits. I would also like to use screen captures from it in my blog posts. I could always photograph the screen, but that goes against my nature, and the results would be objectively bad because the screen is of the era.
This scope is not favored by the community (small memory of only 2500 points, no protocol decoding), but is portable, fast to boot up and has an intuitive user interface. More importantly for this post, the TDS2MM module which I got with the scope provides an RS232 port (alongside GPIB and a Parallel port) I can use to connect to it. Tektronix has some software that allows you to interface with the scope, but it’s Windows-only and overkill for my purposes.
The scope allows for “printing” in various formats to each of its outputs. Apart from output compatible with various 90s Hewlett-Packard and Epson printers, it offers BMP, PCX, TIFF, RLE and EPS output. Once you pick the output and format, the Print button on the front panel conveniently sends the data through the chosen port.
Connecting the oscilloscope
The easiest and cheapest (but not highest-performance) way to interface with your modern Linux computer is definitely a USB-to-RS232 interface with a DE-9 port (watch out, you may need a gender changer for it). Figuring out RS232 communication schemes is usually easy, and such interfaces are easy to work with in Linux.
First, let’s out which RS232 parameters (Baud rate, parity, etc.) the scope uses. Pressing the Utility button on the scope, then Options > RS232 Setup brings us to the configuration screen which allows us to change some of these parameters. Obviously, I’d like the transfers to be as fast as possible, so I picked the highest Baud rate available, and set the other parameters to personal taste (and what seemed the easiest to work with). These are the settings I ended up with:
| Baud | Flow control | EOL string | Parity |
|---|---|---|---|
| 19200 | None | CR | Odd |
Then we need to pick the output format. Pressing the Utility button, then Options > Printer Setup brings us to the configuration screen where we pick EPSIMAGE as the format, and obviously RS232 as the port. EPS (Encapsulated PostScript) promises a beautiful vector-based output.
Let’s use picocom to look at the output. Since PostScript is a textual format (actually a Turing-complete language), we need to map the EOL string properly to see new lines. Take note that picocom actually requires both CR (return cursor to first column) and LF (move cursor down one line) to properly display the text (even though Linux usually uses just LF). Setting the scope to output CR/LF doesn’t seem to work, so we must set it up to output CR, then map that CR into a CRLF for display purposes with --imap crcrlf.
When we run picocom and press Print on the device, we get the PostScript code!
EPS - saving into a file
Okay, now that we know that transfers work, we need to figure out how to save the PostScript into a file.
Looking at the output in picocom, we can see that it begins with %!PS-Adobe-2.0 EPSF-2.0 and ends with %%EOF. That should make it easy to know when the file was read to the end. It’d also be nice if we could have the script listen for transfers, and save each screen capture into a new file.
Interacting with a tty on Linux is a simple combination of setting the appropriate tty settings (can be done with stty from shell) and reading/writing the appropriate /dev/tty* device file. Doing it all from a shell requires no dependencies, so there’s no reason to use anything but shell; Bash is a bit easier than POSIX shell, so let’s go with that.
#!/usr/bin/env bash
DEVFILE=
# check if it's a character device
if ! [; then
fi
# save stty state and restore it on exit
OLD_STTY=""
STTY_SETTINGS="19200 raw parenb parodd hupcl \
clocal icrnl -iexten -echo"
# set stty state, repeat if it fails
# shellcheck disable=SC2086
||
# Set the device to:
# 19200 baud
# flow control: None
# EOL string: CR
# parity: odd
# shellcheck disable=SC2002
| while ; do
# Ignore data before the prologue
&& continue
out="out_.ps"
START_TIME=""
while ; do
|| {
break
}
# break if epilogue found
&& break
done
ELAPSED=
done
The script detects the PostScript prologue and starts writing to a new file, until it detects the epilogue. The script also cleans up after itself, restoring the stty values.
After running the script and pressing the Print button, it takes some 23 seconds to receive the screenshot. Not too bad, but not great. The resulting file weighs around 25KB. We can now finally inspect the received EPS. Opening it with zathura (zathura-ps required) yields - disappointment. Not a vector in sight. The file contains a bitmap of the screen, and it is in the middle of the page.
Inspecting the file, we find the actual bitmap part encoded as a hex string, and a bit of PS code that sets the page size and displays the image. That hex string seems wasteful (1 byte encodes to 2 hex bytes). Even base64 seems efficient in comparison (3 bytes encode to 4 base64 bytes), but I guess that PS only supports hex for saving bitmaps.
It’s obvious that this is not the most space-efficient way of saving the bitmap, and actually converting the PS file into a pixel-perfect bitmap in some more widespread format isn’t trivial, probably probably requiring use of ghostscript. The size issue reflects on transfer speed.
So, after all, it makes more sense to try receiving one of the binary bitmap formats instead.
Figuring out the best raster image format
Let’s take into consideration that the bitmap sent isn’t color-diverse and is either 256-colors or some sort of indexed / palette color . You can figure that out from the screen itself. The screen resolution is 320×240, for reference.
Let’s try to find what’s the optimal format among those offered by the oscilloscope:
- RLE is likely a run-length encoded bitmap; this is a primitive, better-than-nothing compression algorithm
- PCX has indexed colors and is RLE-encoded
- TIFF can have palette colors, and can support LZW compression, which is usually better than RLE
- BMP is unlikely to be compressed, especially with RLE showing as a separate option
We don’t seem to be able to infer which format is the most space-efficient, because we don’t know which exact variants of these formats are supported by the oscilloscope. What we can conclude is that all of these are binary formats.
Let’s try just receiving captures in all of the formats, and then compare their file sizes. To capture any of the formats, we use the following trivial process:
- Use
sttyto set the appropriatettyparameters catthettydevice into a file- Pick the format in the oscilloscope’s menu, press the Print button to start the transfer
- In parallel, watch that file with
tail -f, to see when the process stops - Ctrl-C the
cat
Here are the commands:
# in another terminal:
Running these commands, we get these files with wildly varying sizes (and transfer times):
| Format | File size (KB) | Transfer time (s) |
|---|---|---|
| BMP | 80 | 44 |
| PCX | 13 | 8 |
| TIFF | 17 | 10 |
| RLE | 16 | 11 |
Seems like the PCX file is the winner, and it’s 8 second transfer time is quick enough not to be intrusive.
These formats are suboptimal for modern web publishing (and they are quite large for what they are), but converting them to PNG is trivial with ImageMagick:
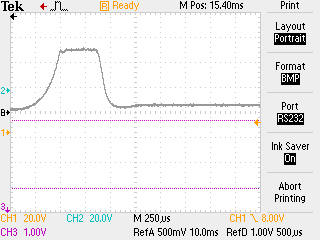
The resulting file is a slender 2.6KB. Running optipng on it only saves us another 100B, so no point in doing it. I’ve teased enough, here’s what the end result looks like:
Quite charming, especially when combined with image-rendering: pixelated CSS property and with size being an integer multiple of the original size.
Note the Ink Saver: On option in the screen grab: it’s responsible for this quite elegant color scheme. Otherwise, the default color scheme has a saturated blue + black background that would have surely inspired me to palette-swap it. I won’t desecrate this blog and post a screenshot.
Capturing raster images with a script
It’d be nice to have a script which automatically receives the image and saves it into a file, without having to manually look at the tail -f output.
My first intuition was to try and figure out how many bytes each transfer would contain, and then dd it into a file. These binary file formats usually have a fixed-length header which contains the size of the image, which you use to figure out how many bytes you need to read. We could use dd to read that size, and then use dd again to read the rest of the file.
Then it dawned on me: the transfer from the oscilloscope is a continuous, uninterrupted stream of bytes. When the stream stops for a while, we can safely infer that the transfer is complete, just like we did while initially receiving the files.
I tried searching for a tool online that allows us to stop a transfer (or pipeline) when no bytes appear on the input for a while, to no avail. PySerial seems to have such an option, but that’s kind of overkill.
When we do this manually, we cat the tty and look at the tail -f output of the destination file to see when it stops changing. How can we do something similar programatically? By looking at the mtime of the destination file in a loop. When it stops changing for a while (the timeout), the file transfer is done and we can kill the cat by PID. We let the cat run in the background beforehand.
I’ve added a couple of conveniences to the script that implement this idea:
- It runs continuously and creates a new file for each new transfer
- It shows the elapsed time during transfers
- There’s a cleanup block that restores
sttysettings, kills any leftover processes, removes temp files - The file names are automatically generated with timestamps
- We infer the extension from the file’s magic number using
file - If ImageMagick is available, we automatically convert the output to PNG
Finally, here’s the script. I hope it’ll inspire you to use Bash for similar jobs, it fits this role competently. You can take Bash too far and create an unmaintainable mess (and some people love doing that), but tasks like this are right in the middle of its comfort zone.
#!/bin/bash
SERIAL_PORT=""
TIMEOUT=
# check if it's a character device
if ! [; then
fi
# Save the current stty settings to restore on exit
OLD_STTY=""
# Configure the serial port
STTY_SETTINGS="19200 raw parenb parodd hupcl \
clocal -iexten -echo"
# shellcheck disable=SC2086
||
# Continually read from the serial port,
# create new file for each transfer
while ; do
# Create a temporary file
TEMPFILE=""
# Start reading from the serial port into the
# temporary file
&
CAT_PID=
# Define a cleanup function
# Wait until there's data in the temporary file
while ; do
done
START_TIME=""
# Monitor the temporary file's size, stop when
# it stops being modified
while ; do
# calculate time for showing progress
CURRENT_TIME=
ELAPSED_TIME=
SECONDS=
MINUTES=
HOURS=
ELAPSED_TIME_STR=""
# take note of output file
# mtimes before and after pause
LMTIME=
NMTIME=
# If the file hasn't been modified for
# $TIMEOUT long, kill the cat,
# move / convert the file
if ; then
# Form the output file name using the date
OUTPUT_FILE="out_"
FILE_TYPE=""
EXTENSION=""
if ; then
fi
break
else
fi
done
done
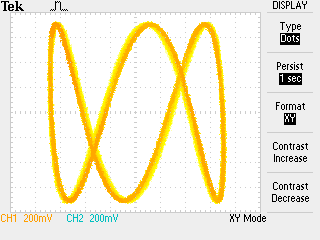
I look forward to using some oscilloscope screenshots in future posts. Finally, no such article would be complete without a cheesy Lissajous pattern.